Post 14: Fixing some things in Unreal
For this project, I think I ended up chose to model an Aztec city. At first, I wanted to do a bigger city that is well known (Tenochtitlan), but this presented a bigger problem for me because the scope was too big. I ended up with a smaller city and more simple than the one I had at first.
During the first weeks, I ended up focusing onto the modeling of the different buildings. I decided to make them modular to be able to make as much houses as possible with differences between each other. I ended up doing two different type of buildings: one for common houses and the other one for noble houses. This presented a problem to me because a lot of the modular pieces were too big in polycount, and this would present a problem in the future. I had to re-do a lot of parts to make it more simple and less heavy, taking more time than what I had expected at first.
Next, I work on the decoration for the outside of the houses. This did not took much time, only at first when I didn't know how to make different organic shapes in Maya. I ended up asking for help and someone help me to make them into ZBrush, guiding me on how to use it since I did not know how to use it at first.
After that, I decided to do something more simple and that I knew best how to make. That was the props. I was able to finish all the props in one week, which allowed me to also do the UV of all of them. The next week I did the low poly version of the ZBrush models, since they would be too heavy for the scene. I also made some bases that were going to support the houses, because the city was over water.
The next week, I had a lot of troubles with Painter, since it was not detecting my UVs correctly. I had to re-do them and was able to finish the textures for all of my models the following week. This took a lot of my time, so I started to scope down my original idea and had to take out a few other models that I had planed.
To continue, I started to do a mock up of how the city would look like, with different variations on how each house would look like and how many houses would be on each Chinampa. During this period, I decided that it would be a good idea to add a few weapons to decorate the noble houses, since they were usually warrior houses and look to baren at first.
For the weapons, I ended up doing a few different ones, as well as a latter for the second floor on the noble houses. I also did the texturing of these models in the same week, which allow med to start building inside the render program that I was going to use.
For my rendering program, I decided to use Unreal at first because of recommendations on how it could help me use water. I ended up changing this idea because the process of learning how to use it was taking longer and ended up changing it for Marmoset/Toolbag at the end. This helped me to learn a little bit of Unreal, since it was the first time I used it, but the amount of time I had left did not allowed me to continue on it. In the last week, I was not able to do much on Marmoset at the end, because it was constantly crashing down, erasing all my progress in the process (even if I constantly saved).
In conclusion, I think I could have done better if I had more time. My other classes and job took a lot of time that I could have use to learn new programs, as well as dedicated more time to new models and to build the original city. In the future, I would like to revisit this project and take my time to do a better rendition of it.
Post 14: Fixing some things in Unreal
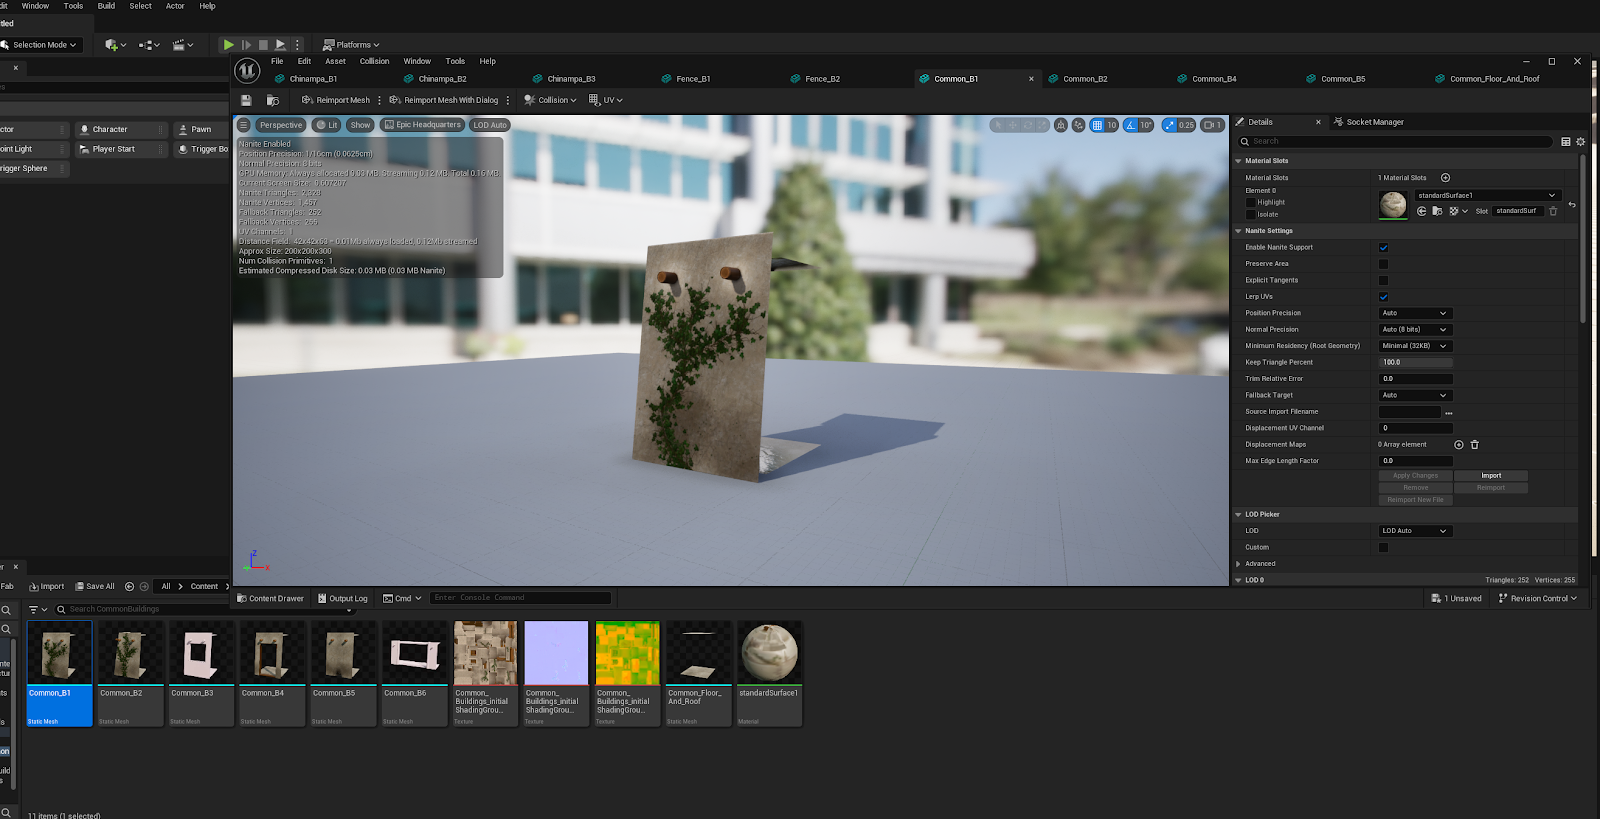
This week was really irrelevant in the creation of the city. I was mostly fixing my settings in Unreal, as well as fixing some issues I had with the textures. I had forgotten to change the materials inside maya, and that was causing troubles with Unreal materials. I had to re-export most of my models since they had old materials that were not working, as well as fixing some of the objects that were not aliened correctly.
I also apply all the materials in the materials into the models, so when I build the city, I can see any mistakes that I made before putting them together in the texturing and fix it.
I had to erase most of my progress from last week, but I think I may be able to still finish on time before the last upload.
Next week, I'll finish all the scene and try fix all the errors that I may find along the way.
Post 13: Building in Unreal
This week I started to build the city inside unreal. This was my first time using Unreal so it was kind of weird for me to use it, since the interface is really different from Unity or even Maya. It was a little hard for me to build the city, especially since I got surgery on my left hand so I was not able to use my hand to press commands. This was a slow process but I was able to at least finish that Chinampa for the common buildings.
First of all, I just started by building the base of the Chinampa. This process had to do a lot of repetition and transformation, which took a long time because of my hand and because I did not know how to use Unreal. In the end, I was able to finish the main base in which the houses will be on.
The next part that I start with, what's the building of the main houses. This was the same as a chinampa, since it was a lot of repetition and transformation. I use all the models that I made for this type of house, and made them small since this type of houses were for lower class. I ended up changing the structure of the houses since the first time that I exported all the objects into the Unreal they were already built inside Maya, which made it to heavy to be able to import it inside Unreal.

To continue, I decorated the houses with all the props that I made for the common houses. This included the canoe, the ceramics, the bedding, and all the rest of the props that were not used for hunting or going to war. This had the same process as the Chinampa or as the houses in which I duplicated and transformed all the different props. One problem that I had though, was the fact that some of the objects did not sit on the floor of the houses or even on top of some of that petates like they were supposed to, and I was not able to fix this problem for the time being because I did not know how to fix the snapping of the objects.
All these problems, as well as the fact that the files became too heavy, made me slow down on the building of the city. This is not an excuse, but is a problem that is going to affect me in the future. I hope that this week, I will be able to build the rich houses a little bit easier. Although, since they are heavier in polycount than the previous ones, I doubt this process is going to be faster. I also do not know how to add the different textures for the objects, but this is not a big worry since I can just add it to the main object in the library and they will change in every single object on the scene.
Post 12: Transferring to Unreal
This week I decided to change my rendering process from Marmoset to Unreal. This was mostly because of suggestions that it could be better. I had never use Unreal in my life, so it was a process that I could use to learn more of it. Although I don't know if it was a complete good idea since I really don't know what to do with it.
First of all, I had to change a few things on Maya to be able to export my models to Unreal. I ended up subdividing a few of my objects that where going to need that, since Unreal do not have a subdivide mode like Marmoset. This made it more hard to import models into Unreal, since they become really heavy on their own.
This was not a hard thing to do, but it made me worry that I would have troubles in the future with them.
This fear came true with some of the objects. I try to only import the static mesh, since I would not need any skeletal body or animations, but it would not allow me to import anything if there were not complete. This made me re-export a lot of models until it allowed me to use them. And since a lot of those items were really heavy in polygons, it too a while to be able to even export them in the first place. This made me to have heavy waiting times doing nothing. And some times I had to cancel the importation since it was taking too long.
I do not blame Unreal for this problems. I think I am the one at fault because I do not know how it works. I spend a lot of time just trying to figure out how to even import models on the first place. I also had a lot of confusion since I was treating this program like it was Unity, which was one of my biggest mistakes because they have different interfaces, even if they are similar in some aspects.
Another problem I face was the fact that some of the static meshes were not being import and I did not know the reason why this happened.
At leas I was able to import some of the models for the common buildings, which makes me wonder what I'm doing wrong on the other models since I was able to import this ones without any issues.
I ended up building a Chinampa out of this models, to see how it would look in the game.
For next week, I hope I am able to learn what the problem is with model's importation into Unreal, and to start budling the scene as soon as possible to be able to get to the vegetation and decoration of the planes.
Post 11: New Props pt. 2
This week I started to make some of the necessary props for the rich buildings. I notice that these were necessary for the decoration of the houses, specially because it has a second floor and they were mostly houses for warriors and more.
To start with, I had to look for more references, since I do not know much about the different weapons that Aztec warriors used. I also didn't know how many did they used. I decided to just do some of the many that they had, since it could be clothed with just weapons.
They had more than what I thought at first, so it was hard to just select a few of them. I also decided to make a latter to make the second floor accessible to the residents of the houses.
For modeling, I decided to model them with simple shapes. They were not difficult to create, but some of them could be a little confusing since I do not have much images to base myself for modeling them. They were not difficult to make after the base shape was done.
I also ended up doing the UV of these objects, as well as their textures. I use wood, rocks, and obsidian, which are the main materials that they used at the time to make these weapons.
For next week, I'll try to finish the budling of the noble houses, since due to time cramping I was not able to finish them this week. I would also like to start looking at some vegetation to put around all the chinampas.
Post 10: Block-out pt. 1
This week I started to build the city, that way it can be more easy to build all of it when is about to be done. I decided to not use primitive forms to create a basic block out, but to go straight to the building of the city, this to save up time and to try to make more models that would be need it in case I have extra time.
Because of the size of the city, is becoming a little bit hard to place more objects on the scene at a time, so I am making the city in different sections. The one that is done is the common residences. They were construct to have a little bit of differences, but constructed in the same basis for every building.
Each house also has their own props to make it look more like a habituated place. The structure of the chinampas is also taken into consideration of how they were built at the time (into a grid pattern). To decorate them, I decided to make them into repetition patterns to save some time, but I may change this if the time allows it.
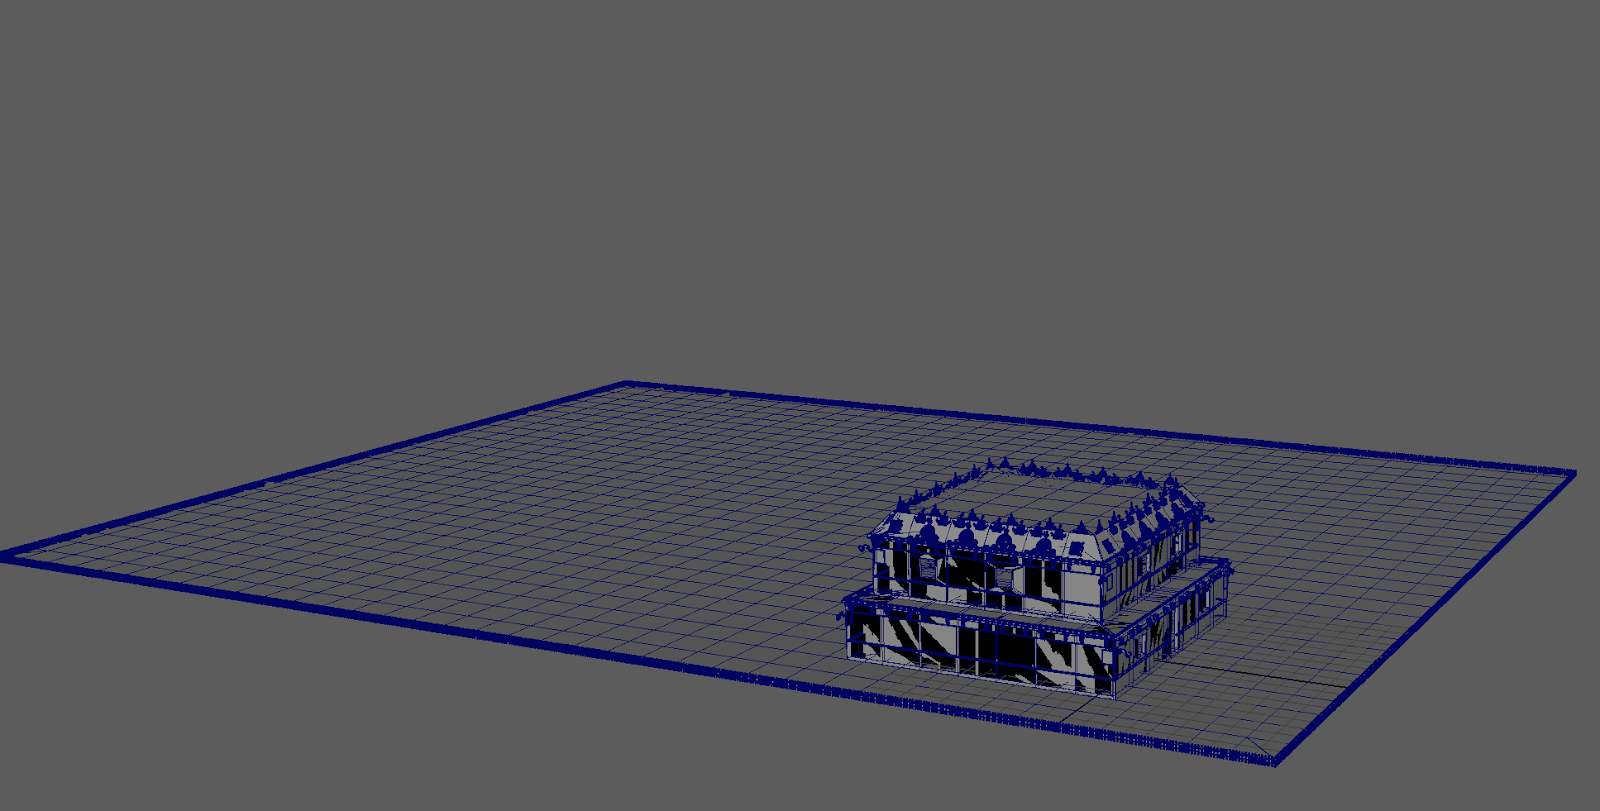
I also started to build some of the noble class houses, as well as their chinampas, but this ones are taking more time because of all the decoration and because they have two stories. They also are going to be bigger and more heavy to handle.
For next week, I'll try to finish the budling of the noble houses and start doing more modeling for things that are still need it (like some stairs and some vegetation).
Post 9: Textures Done
This week I was able to finish with all the textures of all the models done. I was also able to fixed the missing UVs that were causing me problems last week. This was not difficult to do since I was able to redo those specific UVs, without redoing the rest of the objects. Fortunately, I did not had to do this wit all models, just a few of them. I still do not know why did this happened to begging with.
I was able to finish the common building. I decided to add some details that could be on a house at the time. I also made them look like there have been habituated for a long time, and that nature has taken over a little bit to this building.
As for the rich building, I decided to not do them of the same material. The common houses where made more of clay, which is different than doing this ones because they used more expensive materials (different types of rocks). I also decided to do the details of this houses, which were crave into the structure, with alphas to just used it on the textures, without giving it more topology to the models.
And lastly, I also did the based of the Chinampas, fences and house decorations. This ones where very easy to make, since they did not needed much details, since most of them are small or simple. Although I found another problem with one of the decorations, which I do not know what the reason for it is happening, or how to fix it at the moment. I would leave it like that, since I can also copy one of the decorations and used it instead.
For next week, I'll start to building the city with what I have so far, as well as import it into Marmoset to see how it looks.
Post 8: Textures and Missing UVs
This week was really stressful because a few issues with the UVs. Because of how big some models are, I decided to do a tile textures sets, to prevent loosing details in some areas and to make it more easy for me to textures. This was not a problem with the props.
They were really easy to make and to find textures that could work well with the type of material that the objects are made from. As well as the tiling working properly without any issues (except for some UVs on one of the objects missing without any explanations). Other than that, the objects were a win to and easy to make, which caught me out of guard when I had to do the buildings.
For the buildings it was completely the opposite. I also decided to do the tile version of UVs for it, but for some reason it was not working. Even though the UVs were not touching with each other and I had put the correct version of it in Painter, the UVs still where showing as they had an object in front that didn't even exist. They were messing with the overall topology of the textures and, even if I try to arrange them differently or to double check that no shell was on top to another, the problem still persisted with each change. This had me no other choice but to create a single lager texture sheet for each building type. This may made some of the details not show or be too little.
But this was not the only problem. While painting the textures, I discovered that, for some reason, some of the UV shells disappeared again, and I do not know what's causing this in the first place. This is making the whole process more slow and I may have to redo the UVs from the start, to see if I can solve t he problem, which in the end it would make me have to do the textures all over again.
For next week, I'll try to have the UVs fixed and textured, to be able to start with the block out of the objects.
Post 7: Fences and More
This week was mostly centered into having the main bases for the buildings to be located on. As I mentioned on the post before, building where built into artificial islands called Chinampas. Because of this, I had to make the bases where they would be located. This were very easy to make.
Chinampas had an standardized way to be made, so these types of islands would be the same for the big and small buildings, as well as the ones used for farming and for public spaces.
One of the things that I would be having to figure out would be the water that would be sounding the Chinampas. I had never done water before, and even less into a new program for me like Marmoset. I would have to think on this to figure out what type of water would look better or if I just used a normal figure with water textures on it.
Another thing I did was the retopology of the ornaments for the houses. Because of the shapes of the figures, I decided to do them in ZBrush, but this made them have a lot of polygons. In the end, it was really easy to make this with the Retopology tool, so it did not take long to make.
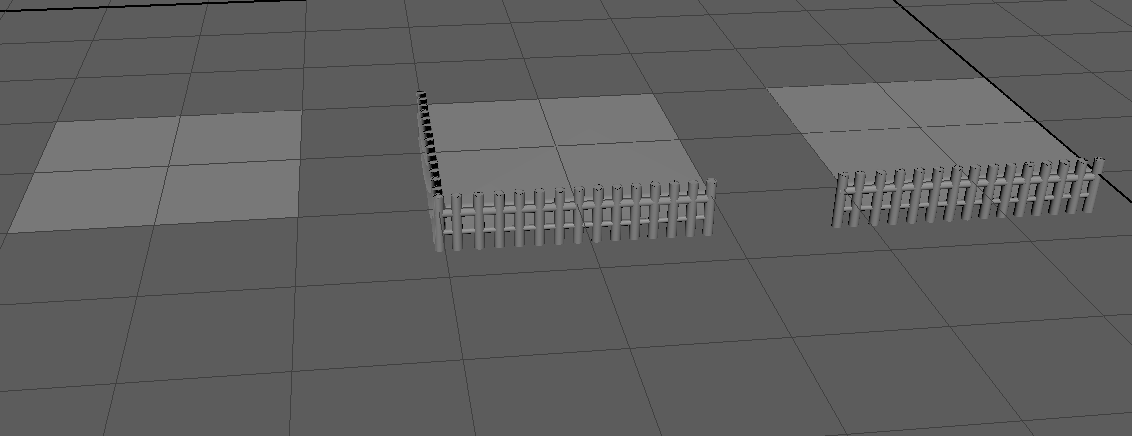
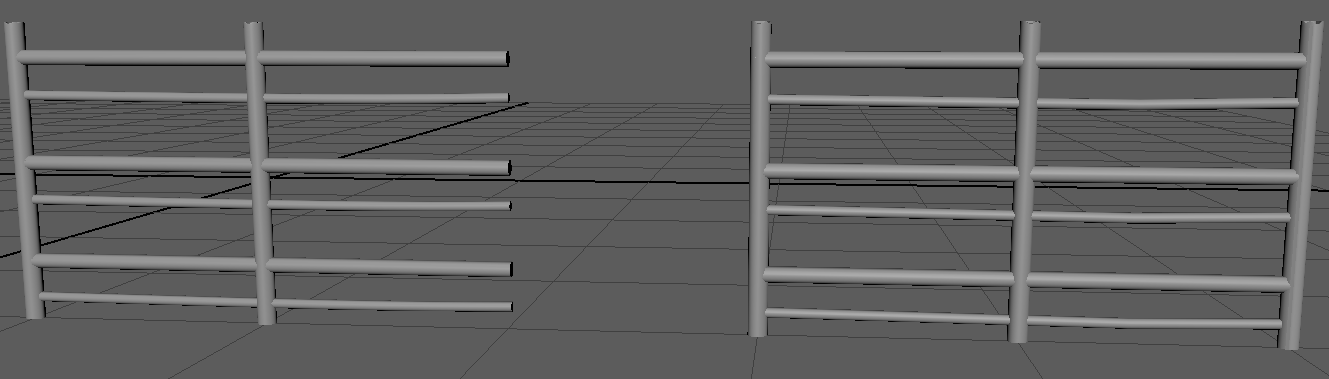
Another thing was to make fences for the common houses, which are the ones who had animals to take care of and used for farming. Because of this, I decided not to make fences for rich houses, since I also did not found any reference where they used fences to keep farming animals. They were made out of logs, so I decided to make them simple and without much decoration, but without the many sticks they used to save on polygons.
And for last, I ended up doing all the UVs for all the models that I made so far. Some of them I did the UVs while doing them (in specific the modular building pieces), but the rest I try to make as much as possible without doing their UVs. Because of this, I decided to dedicate the rest of the week to UV them to prevent to fall down on this aspect. There were a lot of models that I had to do this for.
For next week, I'll start doing the mockup map for the city and start building them with the decorations and houses done.
Post 6: Props
This week was more productive than other weeks. I was able to start with the majority of the props for the houses, which seems to be a lot but in reality are less than expected. I decided to jump on the props to be able to catch up a little bit with the schedule, since in previous weeks I was getting behind because of time and the complexity of the figures.
Is hard to tell with which prop to start. I decided to look for their appearance first and, since I have seen most of them in real life because of my upbringing, it was really easy to figure them out for the most part. The names may be a little weird for some.
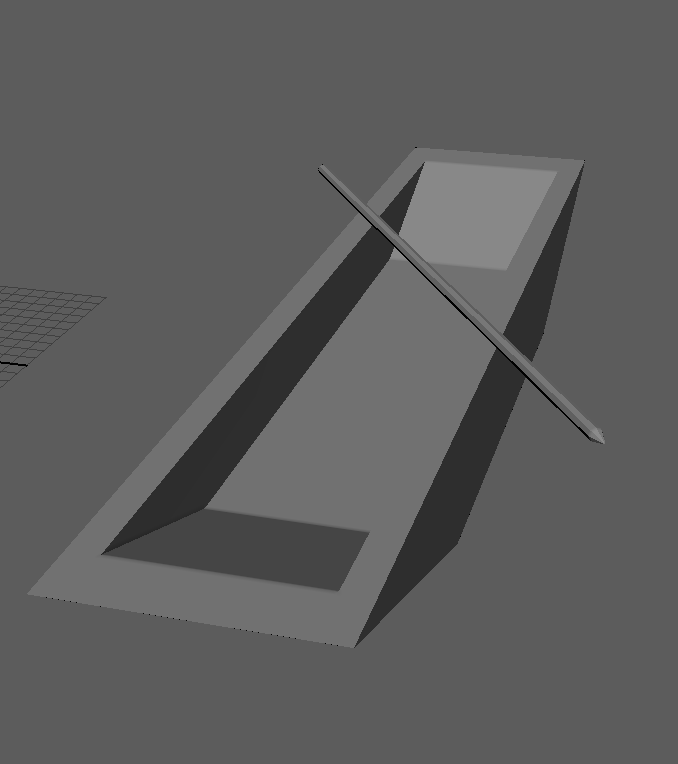
Lets start with the "petates." This objects are the equivalent of beds or even carpets. They were used instead of dining tables or plus bed. They are made out of a palm fibers that were woven to create a hard resistant cover. This one was easy to make when was the extended version, but the bed and the rolled versions were a little more difficult since I had figured them out. In the end, I was really happy in how they turned out.
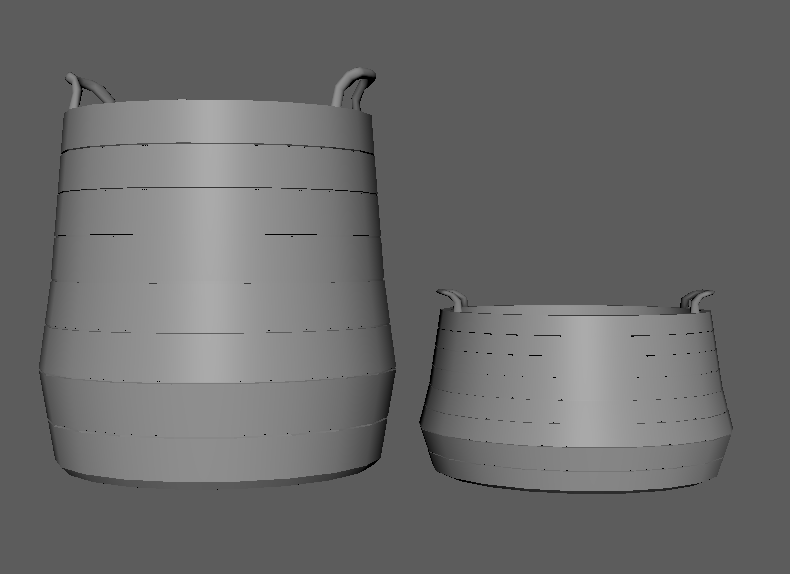
Next were the two types of baskets that I people used to collect their food, storage different objects and more. They were made out of the same material as petates. It was a little difficult to figure out the aspect of the baskets, since I did not see an original one from the time. But using more current versions of them, I was able to come up with one that could had been used at the time.
I'm still not fully convince if the designed would be something that was used at the time, but I'm really happy with the end result of these baskets.
Next is the "acalli," which is a boat or canoe used to move around. Because of the layout of the city, most of it was cover in water and their main transportation was these long canoes that could transport their necessities and allowed them to construct "Chinampas," which was a type of artificial island that allowed them to construct houses or gardens.
The unique shape of this canoe was really easy and fun to make. The measurements where a little hard to figure out, since a lot of the references that I looked varied a lot. Now day, acalli are stilled used, but now they are called "tragineras" and their designed change a little bit for more recreational use, but conserving their main shape.
For the next set of objects, I did a "metate," "molcajete," and "comal." This were used as the main kitchen households and used them to prepared most of their foods.
The metate and its metlapil were used to make flour, paste, dough, etc. This one was really fun to make, since it was easy and has an interesting shape.
Next was the molcajete and its tejolote, which are used to grind spices, make salsa, and blend some other products. This one was the most difficult of all three objects, since the shape prevented me to make it more simple. I ended up making the most simple version of it, which does not have any special ornaments (pig or dog heads) than the ones we use now days.
And the third one was the comal. This one was the most easy of them all, since its shape is pretty simple and is mostly plane. This object is used to cook different types of food, but is specially used to bake tortillas.
These items where the ones I was most familiarized with, since my family used them when I was growing up. Now they use more modern versions of some of them (comal) and stopped using them some of them (metate) because of their hard labor to used them. We still used some of them regularly, since they are pretty useful (molcajete).
And lastly, the ceramics. They were used for a lot of things like holding water, food, fermenting some ingredients and more. These are some of the most common households and most people still used them as their are now days. Their shapes varied a lot, as well as their painting jobs, so they may not need modeling too much, but texturing may have different texture sheets.
They were not hard to model, but they would take some time to texture all the variations.
For next week, I'll try to continue with the last decoration objects, since they are the most complex to make because of their shapes. If I finished them and still have time, I'll start with the different fences for the houses, as well as trying to model the base for the chinampas.
Post 5: House Decor
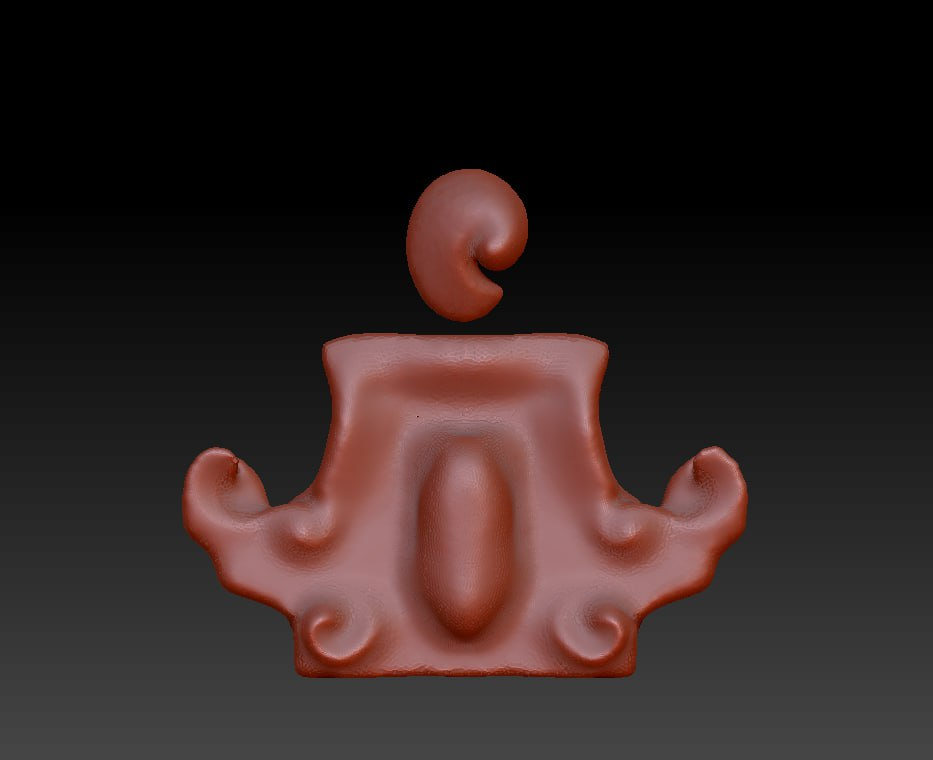
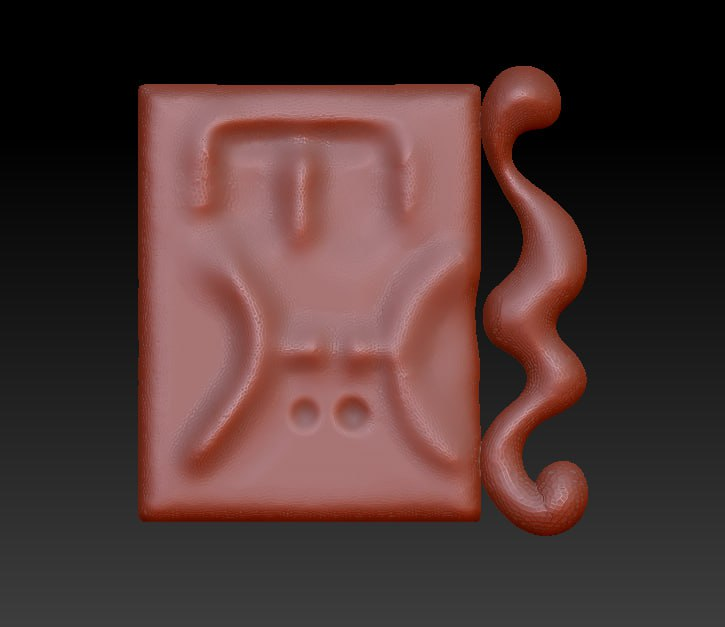
This week was a little too chaotic for me. I started to do the decorations that the walls would have from the outside in the rich houses, but this was a harder task than I anticipated. I was having troubles to make these forms because of their organic shape. That, together with my lack of time, cloud my judgement at first and was giving me difficulties on making something so simple as house decorations.
I first started to keep doing things on Maya. This piece was one of the most difficult or stressful that I had to model. I was not having the desired result I was hopping, and this was making me to go back and forth constantly. In the end, I decided to finish with this complicated topology because it looked close to what I had envision.
To be honest, I am not completely happy with the results of this decoration, but for now would have to stay because of the time I had spend on just figuring out how to make it. It does not look as bad as early versions of it, but it can be improved greatly.
For the other decorations, I decided to take a different approach. I know that ZBrush works well for organic shapes, so I decided to dabble into it to see if I got a different result. I am not good with ZBrush, so I ended up having to get help from tutorials and other people that are more expertise in it. I found this a little bit harder to do, since I am not used to the different system that ZBrush has in comparation to Maya. But in the end I had a good result that was more satisfactory than the one I had at first. I was able to add more details, but it also became time-consuming just because I had to figure out this program too.
In the end, I think this was a bad couple of weeks for my workflow. I became too entangle with one piece and only figure things out at the end of the week. For next week, I think I'll try to do more easy tasks like the props for the houses and the city, so I could catch up with the program. The big buildings would have to wait for now, meanwhile I figure out how to make them with more ease.
Post 4: Last Walls
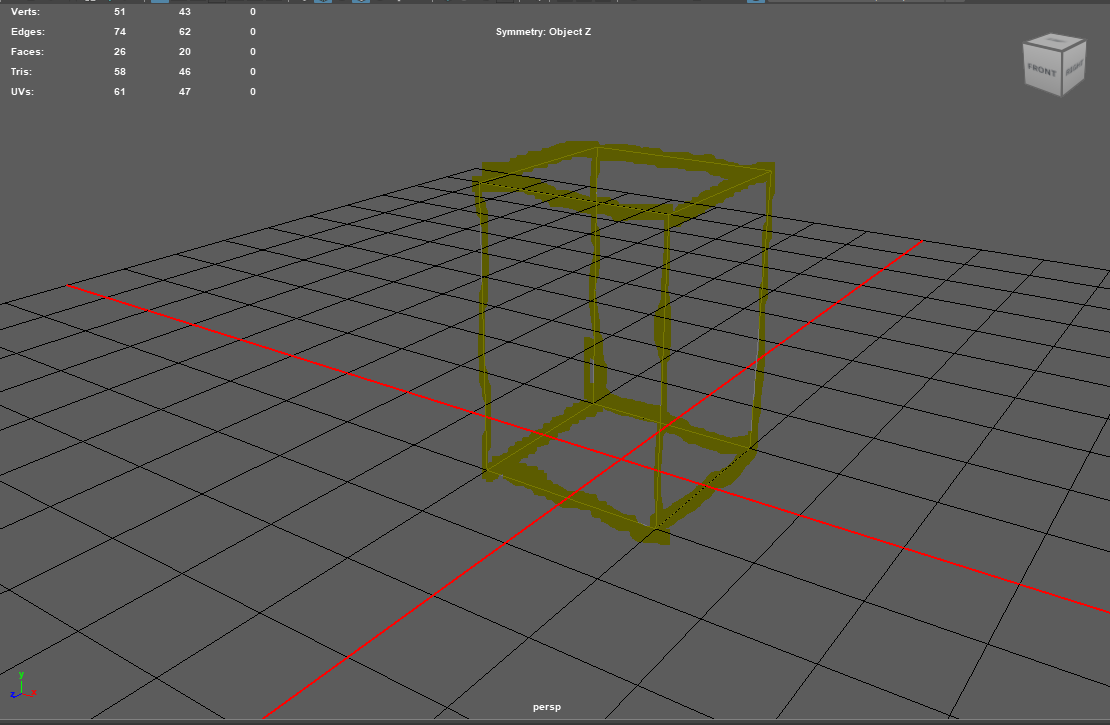
 This time I was put behind by a week. I needed to finish fixing some other walls because of the heavy polycount that I had with the previous models. This was not easy to make, since I had to redo certain parts of the walls because of their geometry. In the end, I was able to reduce their polygons by a lot and they became less heavy, comparing them with their counterparts. I also fixed their UVs and arrange them again for their use.
As for the new walls, they were less complicated to make thanks to my previous experience with the other walls. Although I had some difficulties because of the low quality of my references, I decided to do most of the details in alpha, and start doing the rest of the decoration with the props, to try to catch up with my schedule.
I also decided to do their respective UVs, which was less complicated than the last walls because I didn't had to redo them a lot of times.
For next week, I hope to be able to start modeling the big buildings, which may take a lot of time do to their size and complexity. Even though I am delay, I can still finish on time if I keep my progress at a good speed.
Post 3: Walls: Fixed
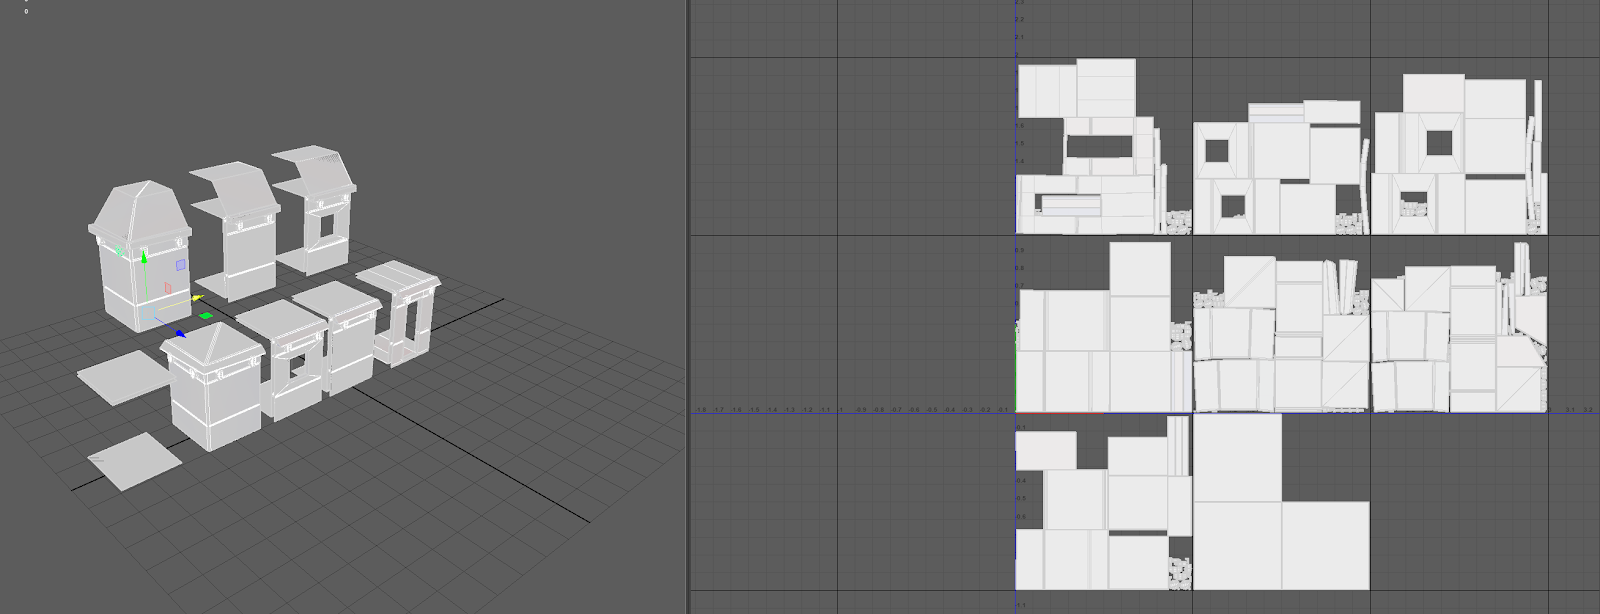
Like I mentioned last week, this time I ended up fixing and redoing the walls. This process was less complicated than before, but it still took me time. I also decided to do the UVing of each piece.
Thanks to this decision, the walls ended up looking more clean and cohesive than before. Although this set me up behind a little bit, I have the basic idea of how to start modeling the rest of the building to save up time and to not make the same mistakes as before.
The UVing of the different walls was pretty simple task, which help me identify which walls were bad or had wrong topology. I also decided to do the inside of the walls, as well as the frame door and window (although these may change in the future, depending of other people's suggestions). I decided to do tile for my UVs for a better work when texturing them.
For this week, I'll try to cover up more ground and finished the other walls, as well as the roads for the city and their respective UVs. I don't like the speed at which I'm currently working, so I would have to pick it up with multiple modeling. The rest of the modeling would be done in coming weeks.
Post 2: Walls
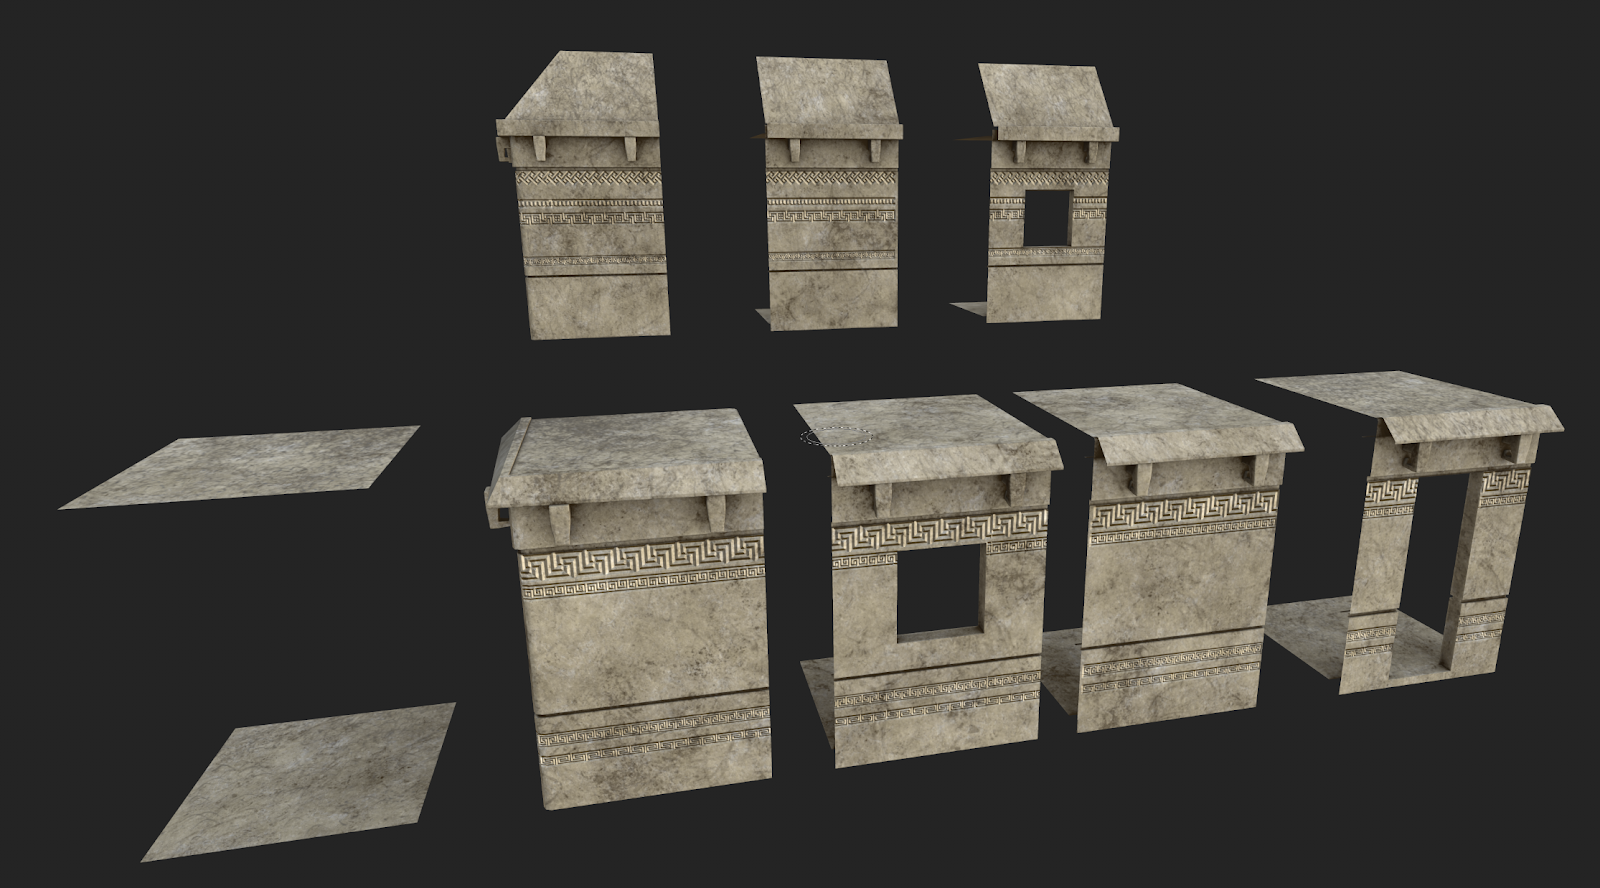
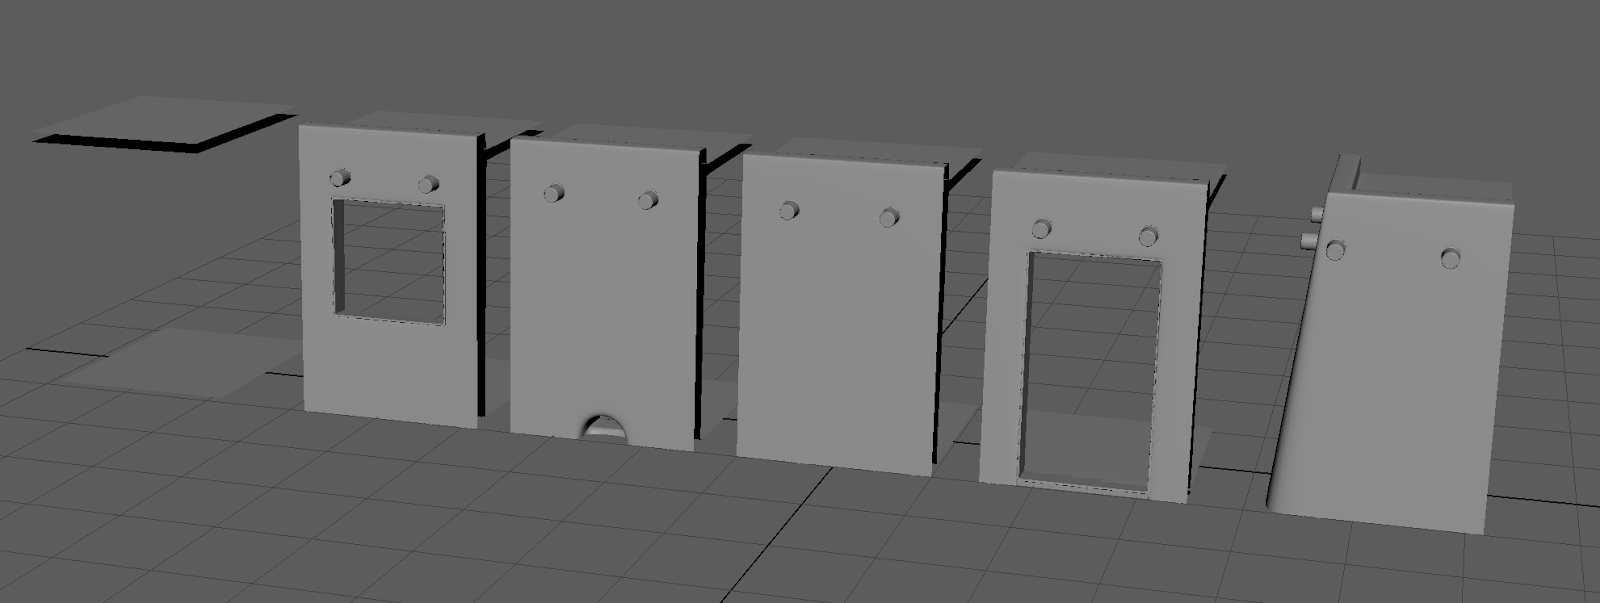
This week was the preparation for walls on the first type of building. Because there are going to be different types of buildings, I decided to make the pieces modular to make different houses with the same type of walls. Although I would have different types of walls in the end because some buildings vary in design.
To begin with, I started doing the parameters that the houses would follow, the average size of each wall and how they would vary between each other. I need it to do this first in order for them to fit with each part. This was really simple to do.
Second, I started to model different walls for the first type of building. This was a little more complicated to do since most of the references images for the houses were different between each other and they also only have drawings that showcase parts of it and not all the houses. I had to do most of certain designs of the houses by imagination.
Even with these advances, I decided that I may have to start everything from the start and redo all the walls. I ended up deciding that I want the interior of the houses too because some houses have open parts for kitchens or living areas. This is going to put me behind a great amount of time, but I think it would be worth it in the end product.
Post 1: Planning
Week 1 - 08/07/2024
One of my goals for last semester was getting better at 3D
modeling, since I want to work as a 3D Artist. One of my problems is the lack
of motivation sometimes, as well as not planning the models well before making
them. This affects my overall progress and time management. The ideas that I
have can seem big or small, depending on the amount of detail each of them has.
My main goal is to recreate the city of Chichen Itza, which is one of the most
important cities for the Aztecs, before the arrival of the Spaniards to
America. I want to plan this project, thinking of all the details each building
would have to prevent burning down, or art block, especially since I’ll be
using references from other media on how the city looked like before.
First, I had to identify how big the project is going to be
by identifying all the different elements that I am going to need for the
project. Because of all the elements that I was looking at, I decided to not
give myself any poly counts and make it more about the art, since I want this
piece to be more emblematic and beautiful but having into account the amount of
time that I have to spend with each piece. Because of this, my timeline would
look like this:
o
Looking for references
o
Decide which pieces to make firs
o
Start modeling the easy pieces (modular for the
simplest buildings) and creating the UV pieces along with each model
o
Finish the last modular pieces and their
respective UV (if not finished)
o
Continue with the most complex buildings (higher
rank buildings) and their respective UVs.
o
Start texturing the finished pieces
o
Start modeling all the props that would be
around the scene with their respective UVs
o
Star texturing all the props when finished
modeling
o
Make the main building or center piece with
their respective UVs
o
Start texturing the main piece
o
Finish any other piece that was not done
o
Start modeling trees and plants (this may take
the most time depending on the plant)
o
Start UVing each plant
o
Finished modeling any plant, building, or prop
left
o
Fixing any UV that was broken
o
Build scene into Maya, to see how it would look
o
Bringing the scene different programs, to see
which one is best for this scene
o
Finishing any other model that was not finished
in the previous weeks.
o
Make sure every file works into the chosen
program
o
Rendering different shots from each object done
o
Rendering different angles of the final scene
o
Present the final project
The timeline would probably change while going along it. Is
not a set in stone and it may become larger or shorter, depending on how
complicated each object is. If it becomes larger, the number of objects on the
list may shorten. If it becomes shorter, I may add new objects or do another
project if the time allows it.
Reference images gathered:


No comments:
Post a Comment
Note: Only a member of this blog may post a comment.